
When the first major cold snap of the season arrives, it brings far more than a picturesque layer of frost to your lawn. Sub-freezing temperatures mount a continuous, aggressive assault on your home’s structural integrity and your family’s physical well-being. Winter weather does not simply drive up utility bills and strain aging household infrastructure; it creates serious, often hidden health hazards. From dry, virus-friendly indoor air to deadly carbon monoxide risks and damp, mold-prone living spaces, the cold months demand a robust defense strategy.
Unfortunately, most homeowners wait until the middle of a blizzard or a deep freeze to address drafts, malfunctioning mechanicals, and structural weak points. This reactive approach leads to exorbitant emergency repair costs, disrupted routines, and uncomfortable, unhealthy indoor environments that can exacerbate respiratory illnesses and seasonal discomfort. Preparing your home for winter should never be a rushed weekend chore performed while wearing a parka indoors.
By taking a proactive, system-by-system approach to winterization, you can safeguard your property, lower energy waste, and keep every member of your family warm, safe, and healthy all season long.
Optimize Core Heating Systems for Safe, Reliable Warmth

Your central heating system is your primary defense against winter cold, yet it is often neglected until it stops working altogether. When a furnace or boiler sits idle for half the year, dust settles on the burners, belts dry out, and ignition components degrade. Once forced to run continuously during peak cold, a neglected unit works harder to produce the same heat, driving up monthly utility bills and risking a sudden breakdown during freezing weather. Worse, cracked heat exchangers can leak odorless, deadly carbon monoxide directly into your living spaces while your family sleeps.
To keep your forced-air heating system running safely and efficiently, complete these essential tasks before temperatures plummet:
- Replace air filters regularly: Swap out dirty filters for clean MERV 8 to MERV 11 pleated filters every 60 to 90 days to trap dust, dander, and allergens without restricting the airflow your blower motor needs.
- Clear vents and exhaust pipes: Ensure interior supply registers are unblocked by furniture and exterior intake and exhaust pipes remain clear of leaves, debris, and heavy snowdrifts.
- Test life-safety detectors: Verify that carbon monoxide and smoke alarms work properly on every floor, especially outside bedrooms and near utility rooms.
- Schedule an annual inspection: Hire a licensed heating contractor to examine the heat exchanger for hairline cracks, calibrate the thermostat, clean the burners, and verify safe gas pressure.
If your home relies on hydronic heating rather than ductwork, trapped air pockets inside hot-water radiators frequently cause frustrating cold spots. Air accumulates at the top of radiators over the summer, blocking hot water circulation and forcing families to overheat some rooms just to keep bedrooms tolerable. You can resolve this by opening each radiator’s bleed valve with a radiator key until the hissing stops and a steady stream of water appears. Afterward, check your boiler’s pressure gauge, which should typically read between 12 and 15 psi when cold. If you hear banging kettling noises, spot rusty leaks, or notice a flickering pilot light, schedule local boiler repair immediately to protect both heating efficiency and household safety.
Seal the Thermal Envelope to Stop Freezing Drafts
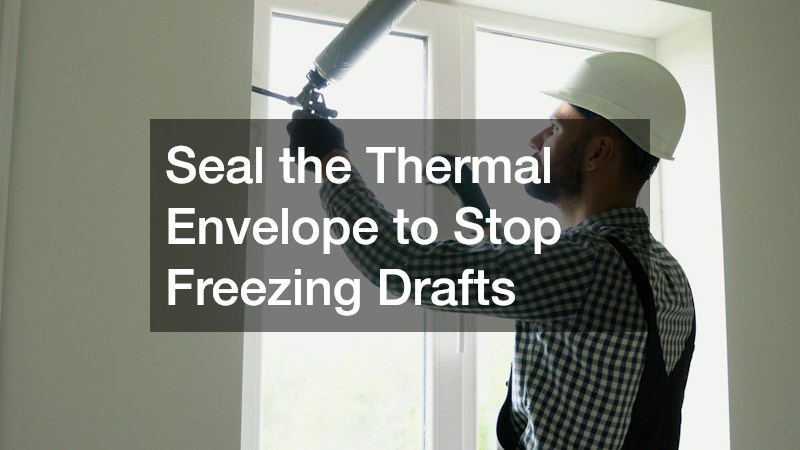
Even the highest-efficiency furnace cannot keep your household comfortable if warm air continuously escapes through gaps in your exterior walls. Up to thirty percent of residential heating energy disappears through drafts around windows and doors. Beyond inflating utility bills, localized cold zones near leaky openings chill the body rapidly, aggravating joint stiffness, triggering asthma flare-ups, and disrupting sleep for children and older adults.
To stop freezing air from infiltrating your windows, apply these targeted fixes:
- Re-caulk exterior trim: Apply flexible exterior silicone caulk along gaps where window frames meet siding, as silicone withstands sub-freezing contraction without cracking.
- Seal sash gaps indoors: Press removable rope caulk along the seams of older operable windows that will remain closed until spring.
- Install interior shrink film: Apply clear, heat-shrunk plastic window film over single-pane or unusually drafty windows to create a dead-air pocket that dramatically reduces convective heat loss.
- Upgrade window coverings: Hang cellular shades or insulated thermal drapes and close them at sundown to trap warm air and buffer cold glass surfaces.
- Fix failed seals and frames: When condensation fogs the space between double-pane glass or wooden sashes have warped and rotted, weatherstripping alone cannot hold back the chill. Professional window repair restores broken thermal seals and eliminates moisture-damaged framing before winter storms worsen the rot.
Exterior doors are another major source of heat loss. You can pinpoint invisible leaks on a windy day by holding a lit incense stick near the edges of closed doors; anywhere the smoke wavers sharply indicates a draft. Install heavy-duty silicone door sweeps along bottom thresholds and apply adhesive foam weatherstripping along the jambs to create a tight compression seal. Also adjust loose latch strike plates so each door pulls snugly against its weatherstripping when locked. Pay close attention to the door connecting your house to an attached garage, as sealing this entryway blocks freezing air as well as hazardous vehicle exhaust fumes. Because warped wood or aging hollow-core doors cannot be fully weatherstripped, upgrading to insulated fiberglass or steel door installations eliminates stubborn drafts while strengthening home security.
Fortify Roofs and Attics Against Ice Dams and Heat Loss
Your roof and attic form the critical overhead barrier separating warm indoor air from harsh winter weather. When heat rises unchecked into the attic, it triggers ice dams—one of the most destructive winter hazards a homeowner can face. Heat escaping through an under-insulated ceiling warms the roof deck and melts accumulated snow. As that meltwater runs down to the cold, unheated eaves, it refreezes into a thick ridge of ice. Subsequent snowmelt backs up behind this ice dam, forcing water underneath shingles and straight into ceiling drywall and wall cavities, where dampness breeds toxic indoor mold.
Take these preventative steps in late fall to protect your roof from winter moisture:
- Clean gutters and downspouts: Remove packed leaves and pine needles so melting snow and winter rain drain freely away from your roofline and foundation.
- Trim overhanging branches: Cut back heavy limbs that could scrape protective granules off shingles or snap under wet snow and ice.
- Inspect attic ceilings: Check upper-floor drywall and attic rafters for dark water stains or damp wood after heavy autumn rains.
- Repair vulnerable roof components: Hire experienced roofing services before the first snowfall to replace curled or missing shingles, seal flashing around chimneys and vents, and verify unobstructed soffit-to-ridge ventilation so the roof deck stays uniformly cold.
Protecting the roof exterior works best when paired with a properly sealed and insulated attic floor. Simply laying new insulation over an unsealed attic allows warm, humid household air to bypass the barrier through gaps around recessed lights, plumbing stacks, wiring holes, and the attic hatch. Start by sealing all floor penetrations with fire-rated caulk or expanding foam, and fit an insulated cover over your attic access hatch or pull-down stairs. Verify that bathroom and kitchen exhaust fans vent directly outdoors rather than dumping warm, moisture-laden air into the attic space. Once air leaks are closed, consult professional insulation services to evaluate your current R-value and blow in additional fiberglass or cellulose—or apply closed-cell spray foam to rim joists—to meet cold-climate thermal standards and keep rising heat inside your home.
Protect Exterior Walls and Subfloors From Moisture and Chill

A warm, healthy winter home requires a weather-tight outer shell and well-insulated floors. Throughout late fall and winter, repeated freeze-thaw cycles punish exterior siding. Moisture from sleet or blowing rain seeps into hairline cracks, expands when it freezes, and widens those openings. By mid-winter, wind-driven moisture saturates wall cavities, ruining the thermal performance of wall insulation and creating hidden damp pockets where mold spores thrive and aggravate family allergies.
Walk your property’s perimeter before freezing temperatures settle in to spot exterior vulnerabilities:
- Scan upper siding panels: Use binoculars to check second-story walls for loose boards, cracked panels, or separated seams.
- Reseal utility openings: Inspect and renew caulking around outdoor faucets, dryer vents, gas meters, and cable entry points.
- Verify proper drainage: Make sure soil grades away from the foundation and downspout extensions carry water several feet from exterior walls.
- Repair compromised cladding: If you find rotted trim, buckled panels, or torn housewrap beneath damaged sections, hire a qualified siding contractor to restore the exterior moisture barrier before winter storms hit.
Inside the house, uninsulated subfloors above unheated garages, drafty basements, or vented crawl spaces act like giant heat sinks that pull warmth directly out of your feet and legs, making even a seventy-degree room feel chilly. For quick relief, cover bare floors in bedrooms, hallways, and play areas with thick wool or synthetic rugs layered over dense felt pads, and close exterior crawl space foundation vents for the season. Place heavy-duty, slip-resistant absorbent mats at every exterior entrance to capture melting snow and road salt before they warp hardwood planks or create dangerous fall hazards for children and older relatives. Insulating exposed basement ceiling joists with fiberglass batts further blocks cold air from radiating upward. If you are planning a remodel or want permanent relief from icy floors, consult reputable flooring companies about installing thermal underlayments, engineered hardwood, or radiant-heat-compatible flooring that retains warmth underfoot throughout the coldest months.
Safeguard Indoor Air Quality and Winter Electrical Loads

Keeping your family healthy during winter goes beyond maintaining a warm thermostat setting; it also requires managing indoor humidity and electrical safety. Cold winter air holds very little moisture, and heating that dry air indoors often drops relative humidity below twenty percent. Overly dry air dehydrates nasal passages and throat membranes, weakening your body’s natural barrier against cold and flu viruses while worsening eczema, dry eyes, and nosebleeds. Conversely, humidity above fifty percent causes condensation on cold windows, fostering dust mites and surface mold.
Place inexpensive digital hygrometers in bedrooms and main living areas to keep indoor humidity in the ideal thirty to fifty percent sweet spot. If your home stays persistently dry, work with established HVAC services to install a whole-home humidifier connected directly to your ductwork, and schedule professional duct cleaning to remove trapped dust and allergens before your system runs nonstop all winter. Additionally, always run your kitchen range hood when cooking on gas stoves and ensure fireplace dampers are fully open before lighting a fire so combustion byproducts vent safely outdoors rather than accumulating inside your sealed home.
At the same time, winter dramatically increases strain on your home’s electrical system as families plug in high-wattage space heaters, electric blankets, and seasonal lighting. A single portable heater draws up to 1,500 watts, easily overloading outdated circuits and sparking dangerous residential electrical fires.
Follow strict electrical safety habits throughout the heating season:
- Plug heaters directly into walls: Never connect space heaters to extension cords or power strips, which can overheat and melt under sustained high-amperage loads.
- Enforce a three-foot buffer: Keep portable heaters at least three feet away from curtains, bedding, furniture, and curious pets or young children.
- Inspect cords before use: Discard any electric blanket or heater with frayed insulation, loose plugs, or scorch marks.
- Modernize outdated capacity: If lights dim when appliances kick on, breakers trip repeatedly, or your home still relies on an older 60-amp or 100-amp service box, invest in an electrical panel upgrade to safely support modern winter heating loads and emergency backup generator connections.
Protecting your home and family through the harshest months of the year does not require an overwhelming renovation the day before a major storm hits. Instead, lasting winter resilience comes from taking deliberate, proactive steps early in the season. By servicing your heating equipment, sealing drafts around windows and doors, fortifying your roof and exterior walls against moisture, and managing indoor humidity and electrical loads, you create a warm, healthy sanctuary that performs reliably when temperatures plunge.
Break this winterization checklist into manageable weekend projects starting today. Tackle life-safety priorities first—test carbon monoxide alarms, schedule heating inspections, and eliminate electrical hazards—before moving on to weatherstripping, insulation, and moisture barriers. Taking control of your home’s cold-weather readiness now ensures your family stays safe, comfortable, and healthy until spring returns.